|
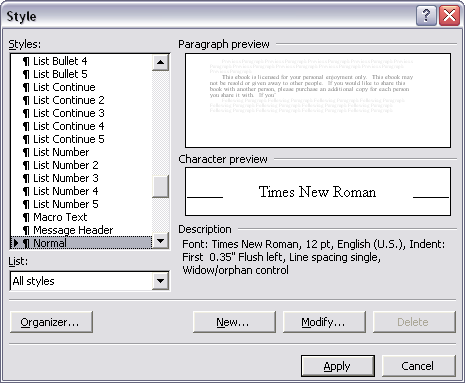
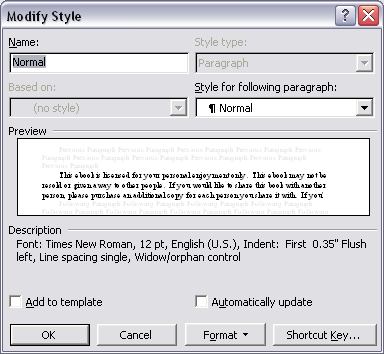
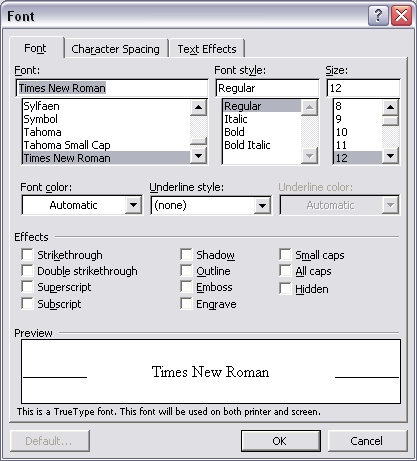
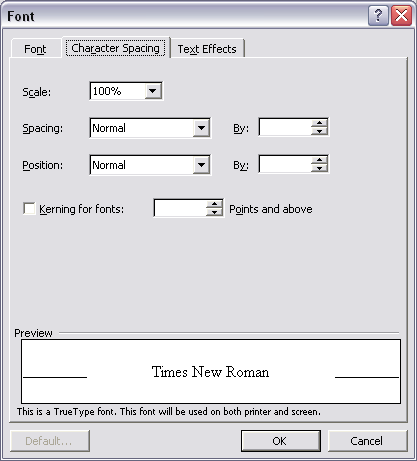
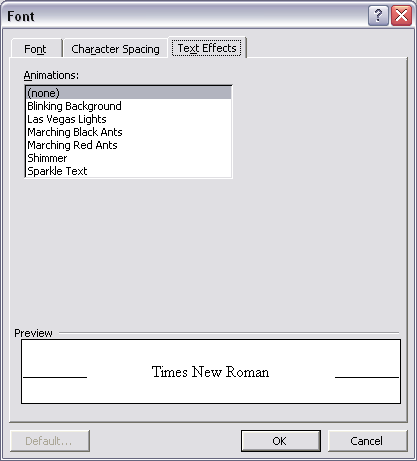
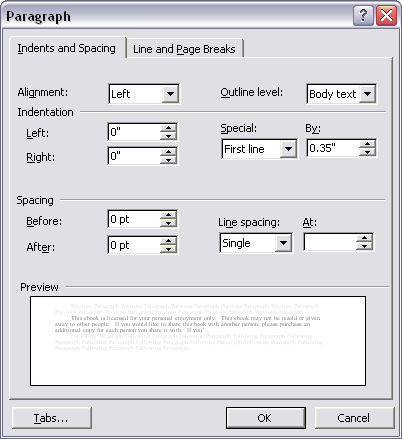
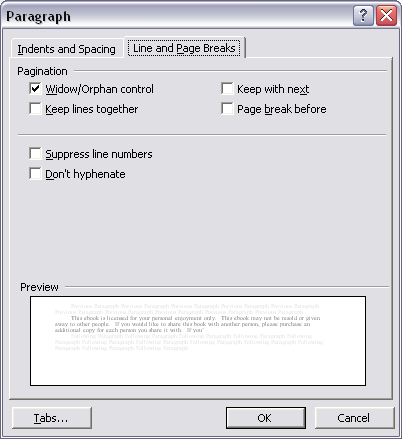
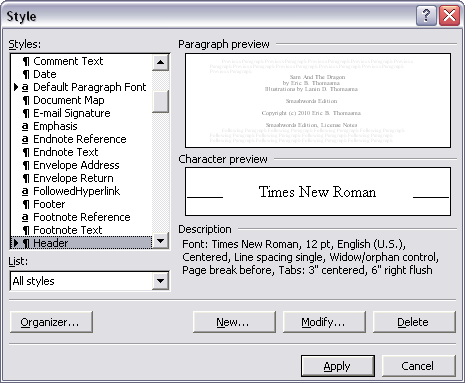
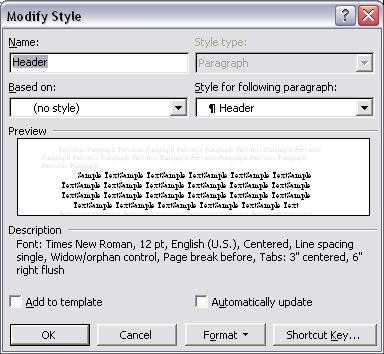
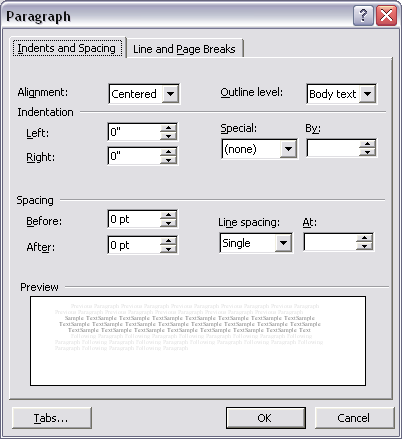
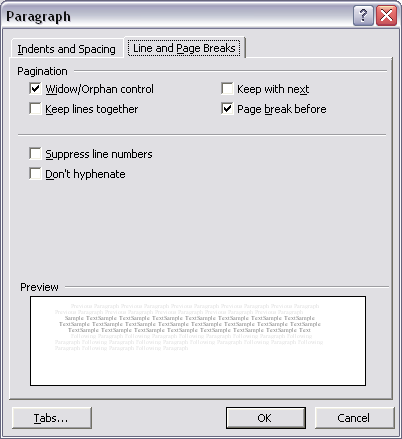
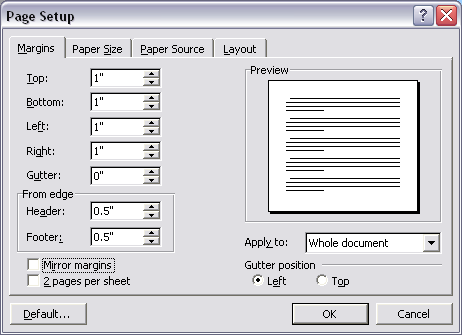
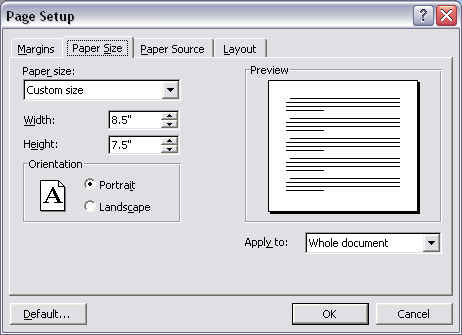
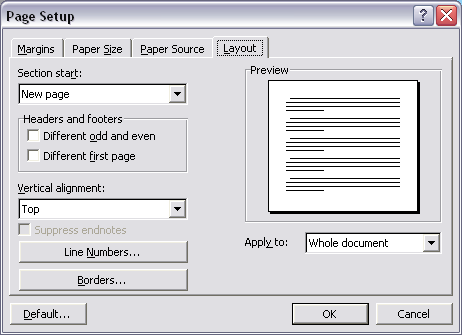
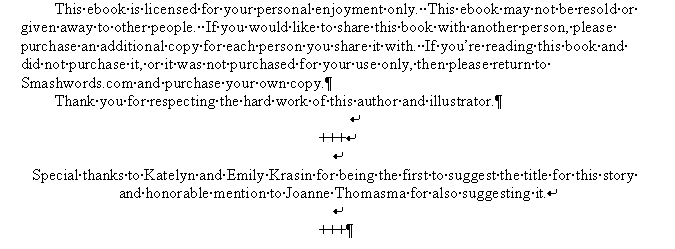
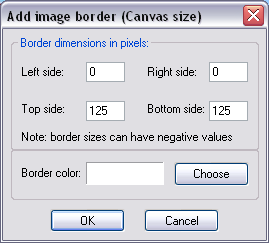
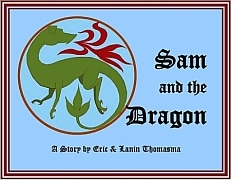
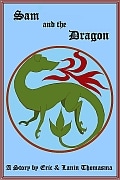
Edited to add: I discovered sometime later that while the following process worked excellent for Smashwords and their "Meatgrinder", it did not work as well when uploaded to Amazon.KDP. KDP's conversion process removed the first-line indents for the "Normal" style and I learned that I had to define a new style (exactly the same as Normal) in order to get KDP to format as I wanted. Even then, there were other problems with using a Word document to upload to KDP. I have since changed to formatting in Word, then importing into MobiPocket to do the conversion before uploading to KDP. This requires some extra work and a basic understanding of HTML to clean up the underlying HTML file, properly recognize the illustrations, and make the converted mobi file appear the way I want. But the end result is a far more predictable and better looking ebook. Tools: MS Word 2000 Irfanview - http://www.irfanview.com/ (Irfanview is free for non-commercial use only. If you are using Irfanview to manipulate images for a book and/or cover that you intend to sell, be sure you purchase a copy.) Note that Smashwords suggests using a single paragraph style for the entire document, but the “meatgrinder” won’t necessarily reject it if you do. This is fortunate, since I used two paragraph styles to format my story. Before doing anything else, I opened each of the illustration pictures in Irfanview and converted them to grayscale to see if any detail gets lost in the translation. I think this is important because sometimes very different colors will look the same when converted to grayscale. After reviewing them, I was satisfied that they would all translate to B&W/Grayscale devices well, so I continued. Preparing The Word Document I started by opening Word to a new document and turned off all of the auto-formatting options. While the document was still blank I set up two paragraph styles, “Normal” and “Header” From the main screen menu I clicked Format then selected Style Normal I made sure “Normal” was selected then clicked Modify. I then clicked Format and selected Font and adjusted the settings for all three tabs, “Font”, “Character Spacing”, and “Text Effects”. Then I clicked OK to accept the changes and return to the Modify Style screen. I then clicked Modify and selected Paragraph, and adjusted the settings for both tabs, “Indents and Spacing”, and “Line and Page Breaks”. (Widow/Orphan control was already checked so I left it that way). Then I clicked OK to accept the changes and return to the Modify Style screen again. Then I selected the style “Header” Again, I clicked Format and selected Font and made it match Normal (above) and clicked OK to accept, taking me back to the Modify Style window. Then I clicked Format and selected Paragraph. I set the alignment as centered, all indentation and spacing to zero, and Single Line spacing. I then went to the Line and Page Breaks tab and checked the “Page break before” checkbox. (Widow/Orphan control was already checked so I left it that way.) Then I clicked OK to accept the changes and return to the Modify Style window, then I clicked Apply to save my changes. With the Format Styles set, I then defined the page by clicking File and selecting Page Setup. I set all of the margins to 1” On the Paper Size tab I defined a custom size. Note that the width is greater than the height, but the orientation is still defined as Portrait. (I experimented with the page size to make sure a picture and the associated text will fit on the same page.) I left the Layout at the defaults. Note that I skipped the Paper Source tab since that’s only relevant when printing. You might wonder why I bothered to adjust the page parameters at all, since most eBook formats don’t have pages, but having the page size defined does work for the pdf and rtf formats, and for the formats that don’t have pages, these parameters are ignored. Entering The Text and Illustrations I prepared the text for my story by copying it to Notepad to make sure it was all plain text, then I broke it into the segments that go with each picture, then left that document open while I prepared the pictures. The pictures that go with my story were originally drawn at a very high resolution, in a landscape orientation, which when pulled into Word were automatically resized to roughly 17% of the original size. I read somewhere that it’s not a good idea to let Word resize your pictures, so I used Irfanview to batch resize all of the pictures, including the cover to a width of 450 pixels, and keeping the aspect ratio locked, that made the height 338 pixels. (The cover that I resized above to match the rest of the pictures is to be included in the document. It was not accepted by Smashwords as a valid cover because it’s wider than it is tall. I created a different image to upload as the cover. I’ll explain that later.) In general, to add the pictures I made sure the paragraph style was set to Header, then I clicked Insert, scrolled down to Picture, then selected From File, then browsed and selected appropriate file. To add the text, I would make sure the paragraph style was set to Normal, then I would highlight the proper text in the Notepad document, hold in the Ctrl key and tap C (copy). Then go to the Word document, hold in the Ctrl key and tap V (paste). This worked for most of the document, but the Front Matter required some additional manipulation. I started the document in the Header style and inserted the cover then hit Enter to end the paragraph, then Enter again, to create a new paragraph with the associated page break. Then I entered the front matter text, but at the end of each line, instead of hitting Enter to go to the next line (creating a new paragraph and associated page break), I held in the Shift key and hit Enter, (Shift/Enter), creating a new line, but not a new paragraph. This is how it looks with the Show feature activated in Word. Note the paragraph mark, (the backwards P thingy), after the word Notes. Then I switched to Normal style for the rest of the information. After the words “author and illustrator” I hit Enter to get to a new paragraph, remained in the Normal style, but switched to Centered Text, then Shift/Enter, +++, then Shift/Enter, Shift/Enter, and my special thanks, then Shift/Enter, Shift/Enter, +++, and Enter to end the paragraph. Then I switched back to Header style, entered the Title, Shift/Enter, the first picture, and Enter to end paragraph. The I switched back to Normal and copied/pasted the text for the first picture from the Notepad document. From there on I set paragraph style to Header, insert picture, hit Enter, switch to paragraph style Normal, then copy/paste text. Until I reached the end of the story. I kept the paragraph style as Normal, changed to Centered, then Shift/Enter, ###, then Enter. Then I switched to Header and hit Enter, then switched back to Normal and entered the Author/Illustrator Bios. The result of this formatting is that for formats that respect the page breaks (like pdf and rtf) the pictures and associated words are neatly displayed on each page. For formats that don’t respect the page breaks, (like HTML), the document flows well from picture to text. Note that page breaks that occur in an HTML document can’t be controlled by the formatting in the Word document, so a picture and associated text may get split. You can view a sample of the converted formats at http://www.smashwords.com/books/view/15208 The Cover (to be uploaded to Smashwords as a separate file) Using Irfanview, I opened the cover image previously resized to include inside the story document (above). I should mention that the cover image is slightly larger than the other images and its resized dimensions are 450 pixels x 350 pixels. From the Image menu, I selected Add Canvas. In the Add Image Border window I set the following values: Left Side - 0, Right Side - 0, Top Side - 125, Bottom Side - 125, Border Color - White. Then clicked OK. This created an image with the original cover vertically centered within a 450 pixel by 600 pixel white rectangle that I saved with a new name and uploaded to Smashwords as the cover. Note that the resulting aspect ratio is 3/4 instead of the 2/3 suggested by Smashwords, but it is a vertical rectangle. After several days of waiting for review with no apparent activity, I figured the 450x600 cover image was preventing it from “bubbling to the top” and decided to modify the cover again to be the suggested 600x900. So I opened my original cover image in Irfanview and resized to a width of 600 pixels while maintaining aspect ratio, then added 216 pixels of canvas to the top and 217 pixels to the bottom to make it 900 pixels high. This appeared to allow it to “bubble up” quickly, but was rejected because there was too much white space above and below the actual image and Smashwords considered the resulting image too small for a book cover. Since most children’s storybooks I’ve seen are not vertical rectangles, and Smashwords rejects square or horizontal covers, even when sandwiched into a vertical rectangle, this means a different cover needs to be designed for Smashwords than will be used for print books. In my case, that meant going from this to this This presents a possible challenge for children's books. Redesigning a cover to a vertical rectangle means the eBook will have a different cover than the print Book. For me, the different covers are easily recognizable as being for the same book, but that might not be possible for all books. This could cause confusion for readers that look for the print book in stores after seeing the eBook.
Finally, with the redesigned cover, it was approved for distribution. In reality there were many more redesigns, corrections, attempts and rejections throughout the entire process, but in the interest of sharing what works and what to watch out for, while not putting you to sleep, I’ve edited out several of the interim steps. If you find this account of my experience helpful, please consider purchasing my story “Sam And The Dragon” at the above address. Comments are closed.
|
